
Creating your own beauty products is an empowering way to control exactly what touches your skin. Learning how to make mascara allows you to bypass the long lists of unpronounceable chemicals found in commercial tubes.
By opting for a homemade mascara approach, you gain total transparency over your ingredients, ensuring that your daily routine remains natural and gentle on your sensitive eye area. Whether you are driven by a desire for sustainability, a need to avoid specific allergens, or simply the curiosity of a DIY mascara project, the process is surprisingly straightforward once you understand the basic chemistry of emulsions and pigments.
The Core Components of Homemade Mascara
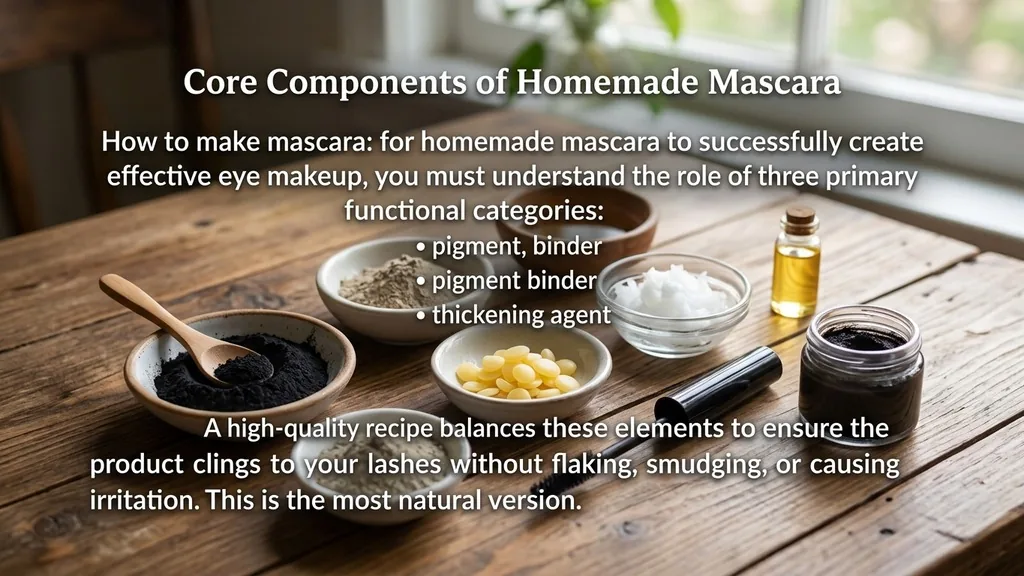
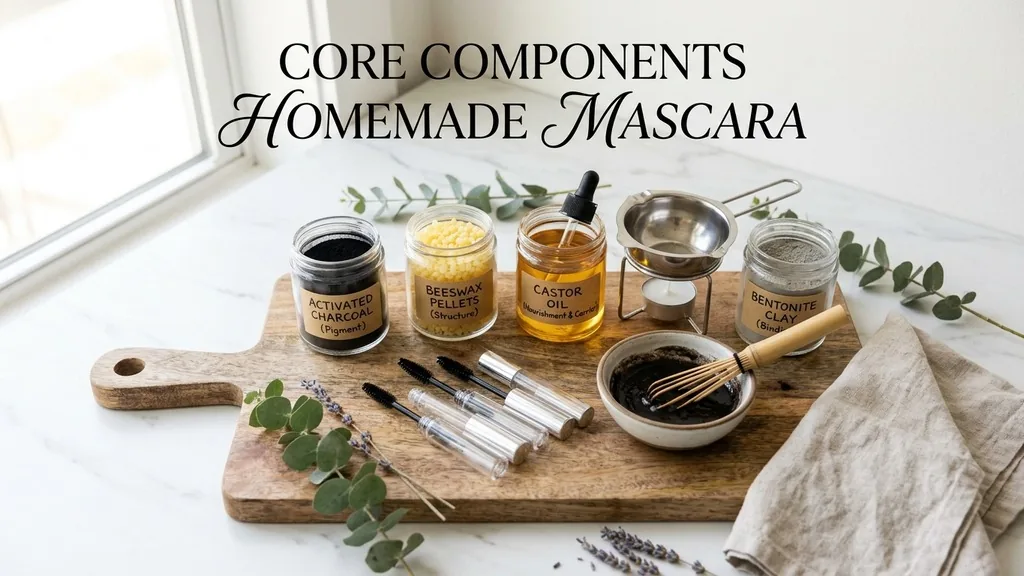
To successfully make effective eye makeup, you must understand the role of three primary functional categories: the pigment, the binder, and the thickening agent. A high-quality recipe balances these elements to ensure the product clings to your lashes without flaking, smudging, or causing irritation. Most natural versions rely on plant-based waxes or oils to provide structure, while mineral pigments like activated charcoal or iron oxides deliver that deep black color we associate with traditional products.
When you are in the planning stage, consider the texture you prefer. Some people enjoy a lightweight, oil-based formula that feels conditioning, while others prefer a more robust, wax-heavy blend that holds a curl. The oil used in your base, such as coconut or sweet almond, acts as a solvent for the pigment and a moisturizer for the hair follicles.
Meanwhile, the thickening agent—often beeswax or carnauba wax—provides the necessary viscosity so that the formula doesn’t run down your cheeks. Balancing these is the secret to a professional-grade finish at home.
Selecting Safe and Effective Ingredients
The foundation of any safe DIY mascara lies in the quality of your raw materials. Because you are applying this substance directly to the eyelid margin, it is critical to prioritize food-grade or cosmetic-grade components.
Avoid using generic art supplies or low-quality powders, as these may contain heavy metals or impurities that can cause severe ocular infections. Instead, look for reputable suppliers that provide safety documentation for their pigments.
Commonly, creators use activated charcoal for the black hue. It is highly porous and binds well to oils, creating a dark, opaque finish. If you have concerns about charcoal, you can experiment with cosmetic-grade mineral pigments like black iron oxide.
However, keep in mind that iron oxides are synthetic-mineral hybrids that offer a more consistent, professional-looking color payoff. Always verify that your chosen pigments are specifically approved for use around the eyes by checking the FDA Cosmetics Guidance to ensure your health and safety remain the top priority.
A Reliable Recipe for Natural Mascara
If you want to make a standard, reliable batch at home, you will need to combine your lipid phase with your pigment phase. A simple yet effective recipe involves melting a small amount of beeswax with a carrier oil, such as jojoba or castor oil, and then whisking in your pigment. Castor oil is a favorite among beauty enthusiasts because it is viscous and often associated with lash health, providing a slight sheen that makes the lashes look healthier and more defined.
Start by melting about one teaspoon of beeswax pastilles in a double boiler. Once liquid, stir in one teaspoon of your chosen oil. Slowly incorporate the pigment—approximately one-half teaspoon of activated charcoal or mineral black—while stirring constantly to prevent clumps.
If the mixture is too thick, add a drop or two more of oil; if it is too runny, add a tiny bit more wax. This process requires patience and a gentle touch, as you are essentially creating a custom emulsion tailored to your specific application preferences.
Addressing Common Challenges and Texture Issues
Many beginners find that their first attempt at homemade mascara is either too dry or prone to smudging. If your formula feels like it is flaking off your lashes by midday, it is likely that the wax-to-oil ratio is off.
Too much wax can lead to brittle makeup that cracks upon movement, while too much oil will lead to smearing, especially if you have naturally oily eyelids or live in a humid climate. Adjusting the ratio is part of the learning curve.
Another issue is the drying time. Commercial products often contain volatile ingredients that cause them to set almost instantly. Without these synthetic additives, your DIY mascara might take a minute or two to fully “set” on the lash.
You can mitigate this by using a clean spoolie to separate the lashes immediately after application, preventing clumping. If you find the formula feels heavy, try reducing the amount of beeswax and using a lighter oil like fractionated coconut oil, which stays liquid at room temperature and provides a smoother application experience.
Comparing Commercial vs. Homemade Formulas
Understanding the differences between mass-produced items and your own creations helps set realistic expectations for your makeup routine. Commercial tubes are designed for a two-to-three-month shelf life and utilize complex preservatives to prevent bacterial growth.
Because you are likely not using industrial-strength preservatives, your homemade mascara will have a significantly shorter lifespan. It is essential to treat your product as a perishable item.
| Feature | Commercial Mascara | Homemade Mascara |
|---|---|---|
| Shelf Life | 3-6 Months | 2-4 Weeks |
| Preservatives | Parabens/Phenoxyethanol | None/Natural Alternatives |
| Application | Predictable/Consistent | Variable/Customizable |
| Ingredient Control | Limited | Complete |
As shown in the table above, the trade-off for purity is longevity. You should only make small batches that you can finish within a few weeks.
If the product changes scent, color, or develops a strange texture, discard it immediately. Never share your DIY mascara with others, as this is the fastest way to introduce bacteria into your small, preservative-free batch.
Proper Storage and Hygiene Practices
Because your natural creation lacks the heavy-duty preservatives found in store-bought tubes, hygiene becomes the most important factor in your routine. Storing your product in a clean, airtight container is essential.
Small, opaque glass jars are ideal, as they protect the formula from UV light degradation. Avoid clear plastic containers if possible, as they can sometimes harbor bacteria in microscopic scratches.
When you use your mascara, try to avoid “pumping” the spoolie into the container. Pumping pushes air into the tube, which accelerates oxidation and can dry out the formula prematurely. Instead, gently swirl the wand to pick up the product.
Furthermore, if you are reusing an old, cleaned-out mascara tube, ensure it has been thoroughly sterilized with boiling water and completely dried before adding your new batch. Even a tiny drop of residual water can create a breeding ground for mold and bacteria, so ensure your equipment is sterile before you begin.
Topical Gaps: Can You Really Use Vaseline or Coffee?
One of the most frequent questions regarding how to make mascara involves the use of household staples like petroleum jelly or coffee grounds. While you will find many online tutorials suggesting these, it is important to understand the limitations. Petroleum jelly, or Vaseline, is a thick, occlusive barrier.
While it can add shine to lashes, it does not dry. If you apply it to your eyes, it will likely smear within minutes and can be quite heavy, potentially weighing down your lashes and causing them to lose their curl.
Coffee grounds, on the other hand, are highly problematic. Coffee is a coarse, organic material. If you use it as a pigment, you are essentially applying tiny, jagged particles to your delicate eye area.
These particles can easily fall into your eye, causing corneal scratches or severe irritation. Stick to finely milled, cosmetic-grade mineral pigments or activated charcoal, which are specifically processed to be smooth and safe for use. Never use food items that have not been processed for cosmetic safety, as they are not sterile and can contain hidden contaminants.
The Importance of Lash Health and Removal
Regardless of whether you choose to make your own or buy from a store, the removal process is a vital component of eye health. Many commercial mascaras are notoriously difficult to remove, requiring harsh rubbing that can lead to lash breakage and fine lines around the eyes.
A great advantage of a natural, oil-based DIY mascara is that it is often much easier to remove. Since the base is likely an oil, it breaks down effectively with a gentle oil-based cleanser or even just a warm, damp cloth.
When removing your makeup, always work in the direction of hair growth. Avoid pulling or tugging at the lids. If you find the pigment is stubborn, saturate a cotton pad with a gentle carrier oil and hold it against your closed eyelid for thirty seconds.
This allows the oil to dissolve the wax and pigment, letting you wipe it away effortlessly. By treating your lashes with this kind of care, you ensure they remain strong and healthy, which is the best foundation for any eye makeup look you choose to create.
Final Considerations for Beginners
Stepping into the world of DIY beauty is a journey of trial and error. You might find that your first recipe doesn’t perform exactly like your favorite store-bought brand, and that is perfectly normal.
The goal of learning how to make mascara is not necessarily to replicate a synthetic product exactly, but to find a functional, safe alternative that you feel good about putting on your face. Experiment with different types of waxes—candelilla wax is a great vegan alternative to beeswax—and try adjusting the pigment intensity to suit your personal style.
Remember that your skin chemistry is unique. What works for one person may not work for another. Keep a simple journal of your experiments: note the ratios you used, the texture of the final product, and how it wore throughout the day.
This data will help you refine your process over time. With enough practice, you will develop a signature homemade mascara that perfectly suits your needs, providing a beautiful, natural look that aligns with your personal values and health goals.
Frequently Asked Questions
- Is it safe to make mascara at home? Yes, provided you use cosmetic-grade ingredients and maintain strict hygiene. Avoid food-grade materials like coffee grounds or art supplies, which can be contaminated or physically abrasive. Always prioritize sterility when preparing and storing your makeup to prevent bacterial growth.
- How long does homemade mascara last? Due to the lack of synthetic preservatives, homemade versions typically have a shelf life of two to four weeks. If you notice any changes in odor, texture, or color, discard the batch immediately to avoid potential eye infections or irritation.
- Can I use activated charcoal for the color? Yes, activated charcoal is a common ingredient in DIY formulas because it provides a deep, matte black color. Ensure it is fine, cosmetic-grade powder to avoid irritation. If you prefer a more consistent, professional finish, consider using cosmetic-grade black iron oxide instead.
- How do I keep my DIY mascara from smudging? Smudging often occurs if there is too much oil in your recipe. If you find the product runs, try reducing the oil content or increasing the wax slightly. Also, ensure your eyelids are clean and free of heavy creams before application to improve adherence.