
Mastering how to do mascara is the most effective way to define your eyes and brighten your overall appearance. Many people struggle with common issues like clumping, smudging, or uneven application, but achieving a professional look requires more than just swiping a wand across your lashes.
By understanding the mechanics of your tools and the specific techniques that suit your eye shape, you can transform your routine from a daily chore into a precise art form. Whether you are aiming for a natural, everyday look or a dramatic, high-impact finish, the following steps will help you achieve consistent, flawless results every single time.
Preparing Your Lashes for Optimal Results

To get the best outcome, you must start with a clean canvas. Residue from previous makeup applications can prevent your mascara from adhering properly, leading to flaking or uneven distribution.
Begin by using a gentle eye makeup remover to ensure your lashes are free of oils and old product. Once your lashes are clean and dry, the most critical step in preparation is using a high-quality lash curler.
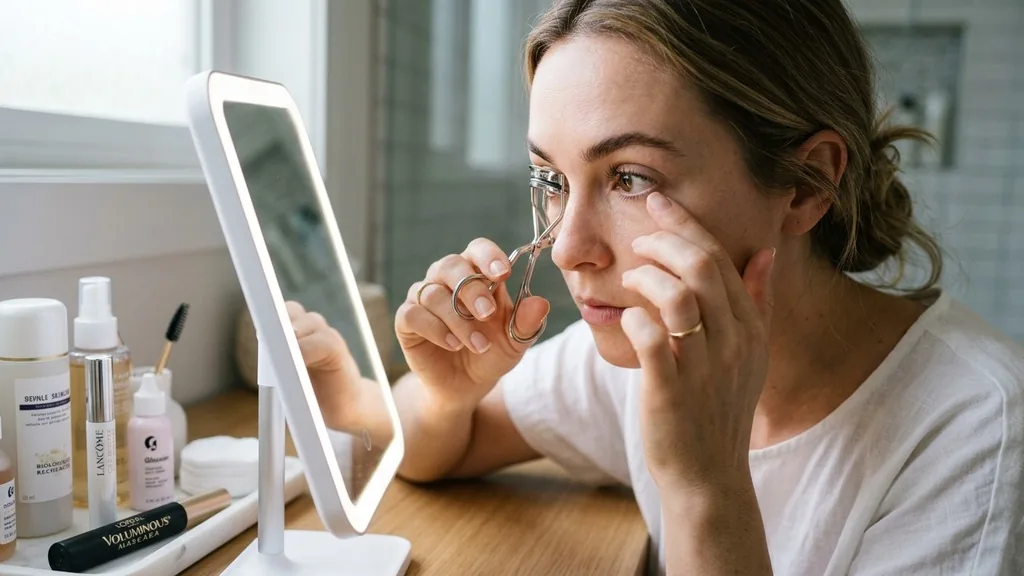
A lash curler acts as the foundation for your look. By applying pressure at the base of your lashes, you create an upward lift that opens the eye and makes your lashes appear longer. To use it correctly, place the curler as close to the root as possible without pinching your eyelid.
Hold for about ten seconds, then move the curler slightly toward the middle of the lash and squeeze again for a more natural, gradual curve rather than a harsh, right-angle bend. If you find your lashes struggle to hold a curl, you might consider using an eyelash primer. This product acts like a base coat, thickening each hair and providing a grippy texture that helps your mascara adhere for longer periods throughout the day.
Selecting the Right Mascara Wand and Formula
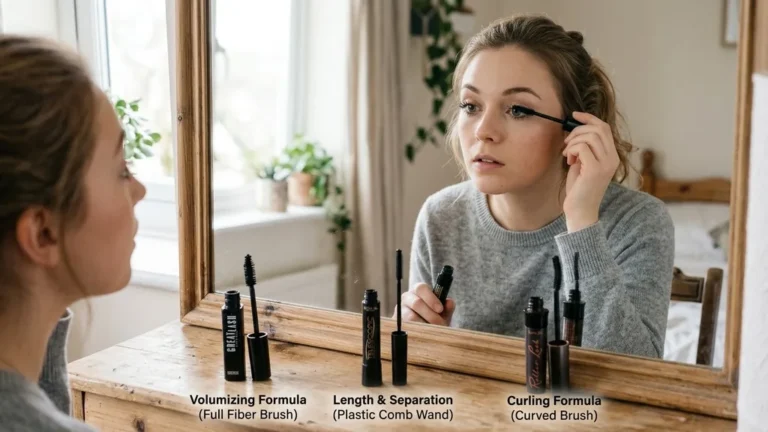
Not all wands are created equal, and the geometry of the brush often dictates the final result. A fluffy, large-bristled wand is typically designed for a volumizing mascara, as it deposits more product onto the lashes to create density.
Conversely, a thin, plastic, or rubber-bristled wand is excellent for precision, separation, and lengthening mascara applications. These finer brushes allow you to get into the inner corners of the eye and catch the tiniest hairs that a larger brush might miss.
Beyond the shape of the brush, consider the chemical composition of the product. A waterproof formula is ideal for long-wear scenarios, such as humid weather or events where you might be prone to tearing, but it is much harder to remove and can be drying to the lashes if used daily.
If you are prone to transfer or smudging throughout the day, a smudge-proof formula or a “tubing” mascara might be your best option. These formulas form tiny polymers around each lash that won’t smear even if your eyelids get oily.
| Mascara Type | Primary Benefit | Best For |
|---|---|---|
| Volumizing | Adds thickness and density | Sparse, thin lashes |
| Lengthening | Extends lash tips | Short, blunt lashes |
| Waterproof | Resists moisture and oils | High humidity or long days |
| Tubing | Prevents smudging | Oily lids and active lifestyles |
Mastering the Root-to-Tip Application Technique
The secret to professional-looking lashes lies in the root-to-tip application. Most beginners make the mistake of only applying product to the ends of their lashes, which can weigh them down and cause them to droop.
Instead, place your mascara wand at the very root of your lashes. This is where you want the most product concentration to mimic the effect of eyeliner and create a “frame” for your eyes.
Once the wand is positioned at the base, use the zig-zag technique. By wiggling the wand back and forth horizontally as you pull it upward toward the tips, you ensure that every side of the lash is coated. This motion also helps with eyelash separation, as the bristles comb through the lashes to prevent them from sticking together.
If you find that your lashes are still clumping, take a clean spoolie brush and run it through your lashes while the mascara is still wet. This simple step removes excess product and ensures a clean, fanned-out finish.
How to Apply Mascara to Bottom Lashes Safely
Many people skip their bottom lashes because they fear smudging or looking dated, but including them can balance your eye makeup and make your eyes look significantly larger. The challenge is that the skin beneath the eye is prone to smudging if the mascara is too heavy. To apply safely, use the very tip of your mascara wand rather than the full length.
Hold the wand vertically so that only the tip touches the bottom lashes. Lightly touch the roots and pull down in small, gentle strokes. If you have particularly long bottom lashes or very hooded eyes, consider placing a small, clean spoon or a piece of tissue behind your lashes while you work.
This acts as a barrier, catching any stray droplets of product that would otherwise land on your concealer or skin. If you are still worried about smudging, use a light coat of a waterproof formula specifically for the bottom lashes, as it will resist the natural oils that tend to migrate down from the upper lid throughout the day.
Fixing Clumping and Common Application Errors
Clumping is the most common frustration when learning how to do mascara. It usually happens when you apply too many coats before the previous layer has had a chance to dry, or when the formula has become too thick over time.
If you notice your lashes sticking together, do not try to add more product to “smooth it out.” That will only make the clumps larger.
Instead, act while the product is still wet. Use a lash comb or a clean spoolie to separate the lashes immediately. If the mascara has already dried, your best bet is to leave it alone or use a tiny amount of lash oil or moisturizer on a spoolie to soften the product before combing through.
To prevent this in the future, always wipe the excess product off the wand onto a tissue before bringing it to your eye. Most wands come out of the tube with far too much product, and a “less is more” approach is key to achieving a natural, fluttery look rather than a heavy, spidery one.
Layering Techniques for Dramatic Volume
If you want to achieve a high-impact, dramatic effect, you need to build your layers strategically. Start with a light, even coat on both eyes to create a base. Wait for this layer to become “tacky”—not completely dry, but no longer wet to the touch.
This usually takes about 30 to 60 seconds. Once the first coat is tacky, apply a second coat, focusing primarily on the outer corners of your eyes to create a cat-eye effect.
For those who want extra length and volume, you might experiment with a fiber mascara. These formulas contain tiny synthetic fibers that attach to your natural lashes, extending them significantly. When using fiber mascara, apply a layer of regular mascara first, then the fiber product, and finish with a final coat of regular mascara to seal the fibers in place.
This prevents the fibers from flaking off onto your cheeks during the day. Always remember that the quality of your finish depends on the patience you have between layers. Rushing the process is the fastest way to invite clumping.
Maintaining Lash Health During Daily Use
Applying mascara daily can take a toll on your lashes if you aren’t careful. Mascara can be brittle, and if you sleep in it or pull at it during removal, you risk breaking your natural lashes. To maintain lash health, always prioritize gentle removal.
Never rub your eyes aggressively. Soak a cotton pad in eye makeup remover, hold it against your closed eyelid for 30 seconds to dissolve the pigment, and then gently wipe downward.
Consider using a lash serum at night to keep your natural lashes hydrated and strong. If you notice your lashes becoming brittle, take a few “mascara-free” days during the week to allow them to recover. Additionally, pay attention to the shelf life of your products.
A tube of mascara should generally be replaced every three months. Beyond this time, the formula can harbor bacteria, and the product itself will begin to dry out, leading to flaking and a much more difficult application process.
Addressing Common Topical Gaps
A frequent question is how to get a “false lash” look without using falsies. The trick is in the layering and the tools. By combining a thickening primer with a volumizing mascara and using a lash curler, you can achieve significant density.
Another gap in knowledge involves “mascara transfer.” If your mascara always ends up on your brow bone or under your eyes, it is likely due to the natural oils on your skin or the length of your lashes hitting your skin. Setting your eyelids with a translucent powder or an eyeshadow primer before you apply mascara can stop the oils from breaking down the formula.
Another often overlooked tip is the “spoon technique.” If you have trouble reaching the roots of your lashes without getting mascara on your eyelid, hold a clean spoon against the eyelid so that the curve of the spoon sits behind the lashes.
You can then press your lashes against the back of the spoon while applying mascara, which allows you to apply force to the roots without any risk of smudging your skin. This technique is especially useful for those with hooded eyes or very short lashes that are difficult to grip.
Frequently Asked Questions
- How often should I replace my mascara? You should replace your mascara every three months to prevent bacterial growth and ensure the formula remains fresh, effective, and free from clumping.
- Can I use a hair dryer to heat my lash curler? It is not recommended to use a hair dryer, as it can easily overheat the metal and burn your delicate eyelid skin.
- Why does my mascara smudge under my eyes? Mascara smudges when it reacts with natural skin oils. To prevent this, set your under-eye area with powder or use a tubing mascara that forms a water-resistant polymer around each individual lash.
- Is it okay to pump the wand in and out of the tube? Avoid pumping the wand, as this pushes air into the tube, which dries out the formula prematurely and increases the risk of contamination from environmental bacteria.
Achieving the perfect lash look is a blend of using the right tools, like a reliable lash curler and a high-quality spoolie, and mastering the physical technique of the application. By focusing on root-to-tip coverage and utilizing the zig-zag motion, you can ensure that your lashes are defined, separated, and voluminous.
Whether you are dealing with sparse lashes that need extra thickening or just want to highlight your natural eye shape, the consistent application of these methods will elevate your daily routine and leave you with professional results. Remember that the health of your lashes is just as important as the product you choose, so always prioritize gentle removal and regular product rotation to keep your eyes looking bright and healthy for years to come.