
Mastering the art of eye makeup often comes down to the finer details, and learning how to properly apply mascara is perhaps the most transformative skill in your beauty repertoire. While it may seem like a simple swipe-and-go process, achieving that professional, fluttery finish without clumps or smudges requires a combination of the right technique, the correct tools, and an understanding of your unique lash anatomy. When executed correctly, mascara does more than just darken your lashes; it frames the eyes, creates the illusion of a more awake appearance, and adds significant dimension to your overall look.
Whether you are aiming for a natural, everyday aesthetic or a high-drama evening vibe, the way you manipulate the product at the root of your lashes determines the outcome. By focusing on precision and patience, you can avoid common pitfalls like spider lashes or drooping, ensuring your eyes remain the focal point of your face. This guide breaks down the professional secrets to achieving a perfect application every single time, from prep work to the final coat.
Essential Preparation for Perfectly Defined Lashes

Before the mascara wand even touches your eye, your lashes need to be in the best possible condition to receive the product. Many people skip the prep stage, leading to premature smudging or uneven distribution. The first step is ensuring your lashes are completely clean.
If there is residual oil or leftover makeup from the previous day, the new product will struggle to adhere, often leading to raccoon eyes by midday. Use a gentle, oil-free cleanser to wipe your lids and lashes, then pat them dry with a soft cloth.
The most critical tool in your arsenal is the eyelash curler. Many beginners fear this metal device, but it is the secret to an open-eyed look. To use it correctly, position the curler at the very base of your upper lashes, making sure you catch all of them without pinching your eyelid skin.
Squeeze gently and hold for about five to ten seconds. For an extra lift, move the curler slightly toward the middle of the lash length and give it another soft squeeze. This creates a natural, sweeping curl rather than a harsh, unnatural crimp.
Once your lashes are curled, consider the state of your mascara tube. A common mistake is pumping the wand in and out of the tube, which introduces air and causes the product to dry out and clump faster. Instead, gently swirl the wand inside the tube to pick up the desired amount of formula.
If you find there is excess product on the tip of the wand, wipe it off on a clean tissue or the inner rim of the tube. This prevents the heavy, globby application that inevitably leads to clumps. According to the FDA guidelines on eye cosmetic safety, it is also vital to replace your mascara every three months to prevent bacterial growth and maintain the integrity of the formula.
Mastering the Wiggle Technique for Maximum Volume
The core of how to properly apply mascara lies in the physical movement of the wand. Most people simply pull the brush straight up from root to tip, which coats the length but leaves the roots sparse and the tips heavy. To achieve true volume and lift, you must adopt the wiggle technique.
Place the wand at the very base of your upper lashes, nestling it into the lash line. As you pull the wand upward toward the tips, move it in a small, horizontal zigzag motion.
This zigzag movement serves two purposes. First, it deposits a higher concentration of product at the base of the lashes, which acts as a structural foundation. This is essentially the same principle as applying eyeliner; by darkening the base, you create the appearance of a thicker lash line.
Second, the movement separates the lashes as they are coated, preventing them from sticking together in clumps. As you reach the tips, pull the wand upward in a slow, steady motion.
If you want more intensity, you can repeat this process, but ensure you do so while the first coat is still slightly damp. If you wait until the mascara is bone-dry, adding another layer will likely result in flaking or clumping.
It is helpful to look downward into a mirror while you apply the product. By tilting your chin up and looking down, you expose the entire length of your upper lashes and minimize the chance of getting mascara on your eyelid. If you do happen to get a smudge on your lid, do not try to wipe it away immediately.
Let the product dry completely, then take a clean, dry spoolie or a cotton swab and gently flick the dried smudge off. Because the mascara is dry, it will lift away without ruining your eyeshadow or foundation.
How to Address Bottom Lashes Without the Mess
Applying mascara to your bottom lashes is often where people feel the most intimidated. The skin under the eye is delicate, and the lashes are shorter, making them prone to transfer.
To properly apply mascara to these tiny hairs, you need to change your approach. First, you do not need to dip your wand back into the tube for a fresh coat; there is almost always enough residual product on the brush from your upper lash application to cover the bottom lashes effectively.
Hold the wand vertically, parallel to your face, and use just the very tip of the brush. This allows for precision and prevents you from accidentally painting your lower lash line or the skin beneath your eyes. Lightly touch the tip of the wand to your lower lashes, moving from the inner corner to the outer corner.
If you are worried about smudging, hold a small piece of tissue or a plastic card beneath your lower lashes while you apply. This acts as a shield, catching any stray droplets of product.
Remember that the goal for bottom lashes is often a softer, more subtle definition rather than the heavy volume you might want on the top. Over-applying here can drag the eye down and make you look tired.
If you accidentally apply too much, use a clean mascara fan brush or a spoolie to comb through the lower lashes immediately. This will remove excess formula and ensure they look separated and natural.
Choosing the Right Formula and Wand for Your Needs
The success of your application is heavily dependent on the type of product you choose. Not all mascaras are created equal; formulas and brushes are specifically engineered to solve different concerns. When you are learning how to properly apply mascara, you must first identify what your lashes actually need.
Are they naturally straight? Do they lack volume? Are they prone to smudging?
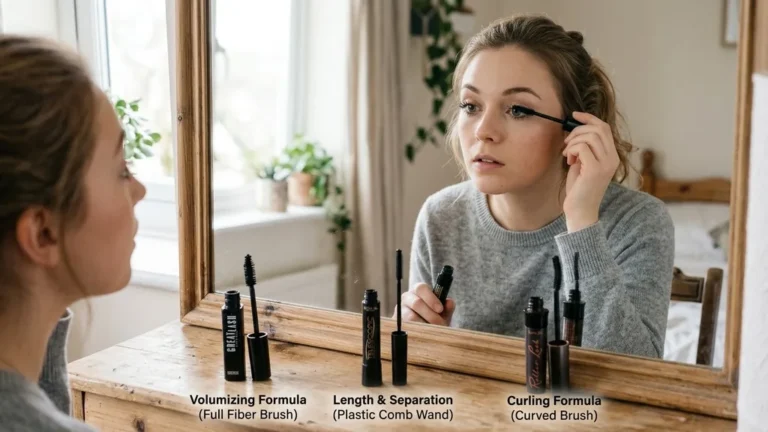
The shape of the wand is just as important as the formula. A thick, bristled brush is typically designed to deposit more product and create dramatic volume, while a slender, rubber-bristled brush is better for lengthening and separating. If you have hooded eyes or deep-set eyes, a smaller, tapered wand can help you reach those tiny inner and outer corner lashes that larger brushes miss.
The following table summarizes how different brush and formula types influence the final look of your eyes:
| Feature | Best For | Application Tip |
|---|---|---|
| Large, Dense Brush | Maximum volume and thickness | Use the wiggle technique at the root |
| Thin, Rubber Wand | Separation and lengthening | Use a slow, steady pull from root to tip |
| Curved Wand | Lifting and curling | Follow the natural curve of the lash line |
| Waterproof Formula | Long-wear and holding a curl | Use an oil-based remover to avoid tugging |
Troubleshooting Common Application Challenges
Even with the best techniques, challenges can arise. Clumping is the most common complaint, often caused by using an old product or applying too many layers of a formula that dries too quickly. If you notice your lashes becoming “spidery,” stop immediately.
Use a clean metal lash comb to brush through the lashes while the mascara is still tacky. The metal teeth are much more effective at breaking up clumps than a plastic spoolie or brush.
Another issue is the “droop.” If your lashes lose their curl shortly after application, it is likely because your mascara is too heavy or contains too much oil. Waterproof formulas are generally better at holding a curl because they are lighter and dry faster, locking the lash in the upward position.
If you prefer a washable formula, try applying a clear lash primer first. A primer provides a grippy base that helps the mascara adhere better and adds a layer of thickness, which can help support the curl throughout the day.
If you find that your mascara smudges on your brow bone or under your eyes, it may be a result of your skin type. If you have oily eyelids, the natural oils can break down the mascara throughout the day.
To combat this, lightly set your eyelids with a translucent powder or an eyeshadow primer before applying your makeup. This creates a dry, matte surface that prevents oil from migrating to your lashes and causing the product to transfer.
Advanced Tips for a Professional Finish
To elevate your look, consider “tightlining” your upper waterline with a waterproof pencil before applying mascara. This fills in the gaps between your lashes, making the lash line appear significantly denser. When you apply your mascara over the top, the transition between your skin and your lashes becomes seamless, creating a high-impact, professional look that lasts for hours.
Another pro tip is to use two different mascaras. Start with a volumizing formula at the roots to build thickness, then follow up with a lengthening or separating formula on the tips.
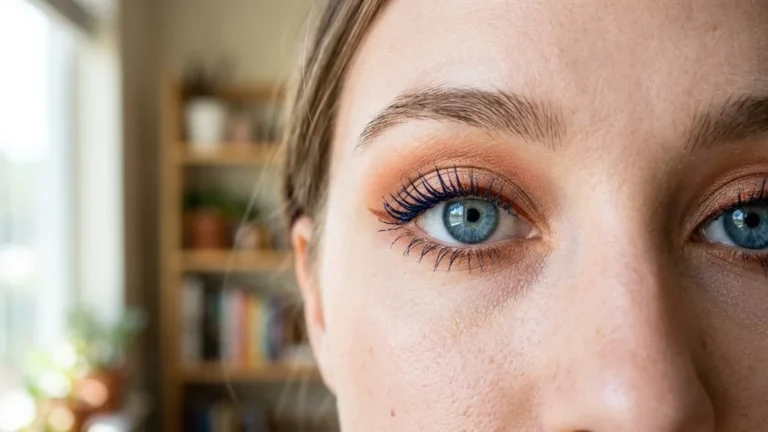
This layering technique allows you to customize the effect based on your specific lash type. You can also experiment with different colors; while black is the standard, a dark brown or navy blue can offer a softer, more subtle look that is particularly flattering for those with lighter hair or skin tones.
- Always curl your lashes before applying any product to prevent breakage.
- Remove excess mascara from the wand to prevent heavy, clumpy application.
- Apply mascara to the roots first to build a solid foundation for volume.
- Look downward into a mirror to avoid getting product on your eyelids.
- Use a clean metal lash comb to separate lashes immediately after application.
- Replace your mascara every three months to ensure safety and performance.
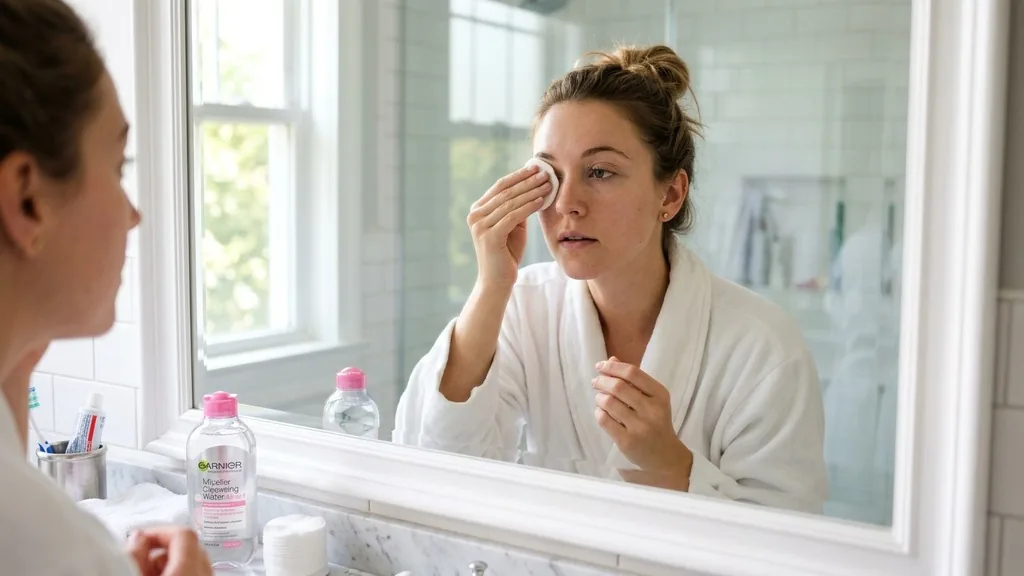
Finally, be mindful of how you remove your mascara. Tugging or pulling at your lashes to get the product off can lead to lash loss and damage. Use a dedicated dual-phase eye makeup remover or a cleansing balm.
Saturate a cotton pad, hold it against your closed eye for twenty seconds to allow the product to dissolve, and then gently wipe downward. This method ensures that your lashes remain healthy and strong, making them easier to work with the next time you apply your makeup.
Frequently Asked Questions
How can I prevent my mascara from clumping?
To prevent clumps, always wipe excess product off the wand before application. Use the zigzag wiggle technique at the roots to distribute the formula evenly, and comb through your lashes with a clean metal lash comb immediately after applying each coat to ensure they remain separated.
Is it necessary to use an eyelash curler every time?
While not strictly mandatory, an eyelash curler is highly recommended if you want to open up your eyes and create a lifted look. It significantly enhances the effect of the mascara, particularly for those with naturally straight lashes. Always curl before applying mascara, never after.
How do I stop mascara from smudging under my eyes?
Smudging is often caused by oily eyelids or applying too much product to the bottom lashes. Set your eyelids with translucent powder to control oil, and use a waterproof formula if smudging persists. Avoid applying heavy coats to the bottom lashes; use only the tip of the wand.
Should I apply mascara to the top or bottom lashes first?
Most professionals recommend applying mascara to your top lashes first. This allows the product to dry slightly while you focus on the details of the bottom lashes. Applying the top first also ensures you don’t accidentally smudge your bottom lash work while looking up to reach your upper lashes.